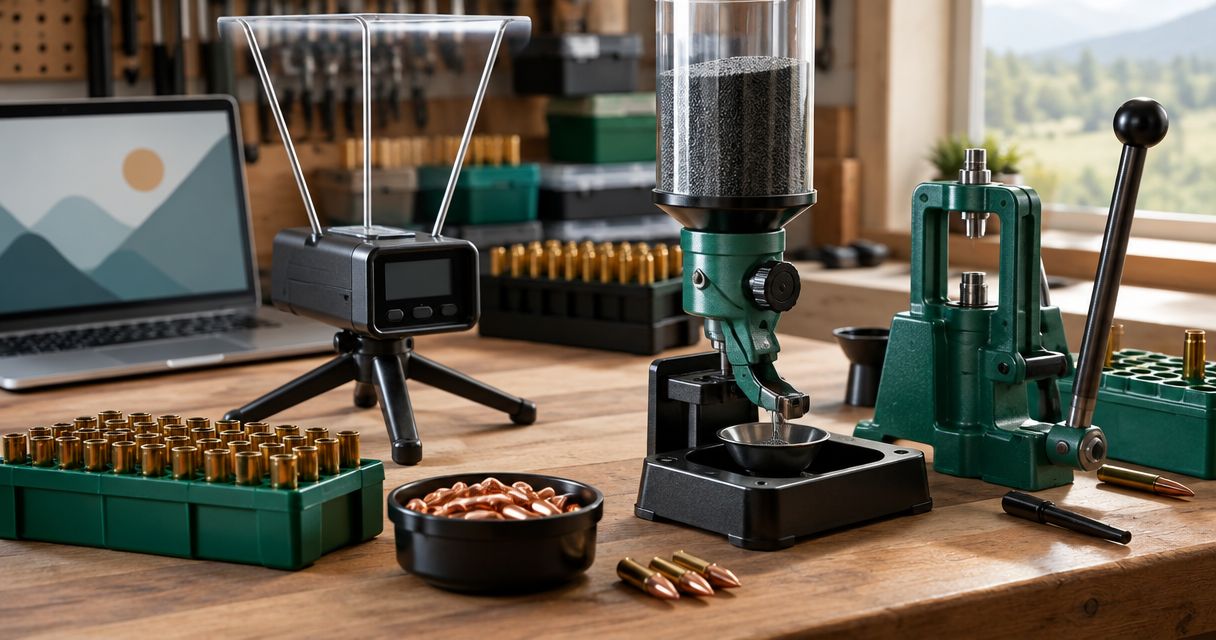
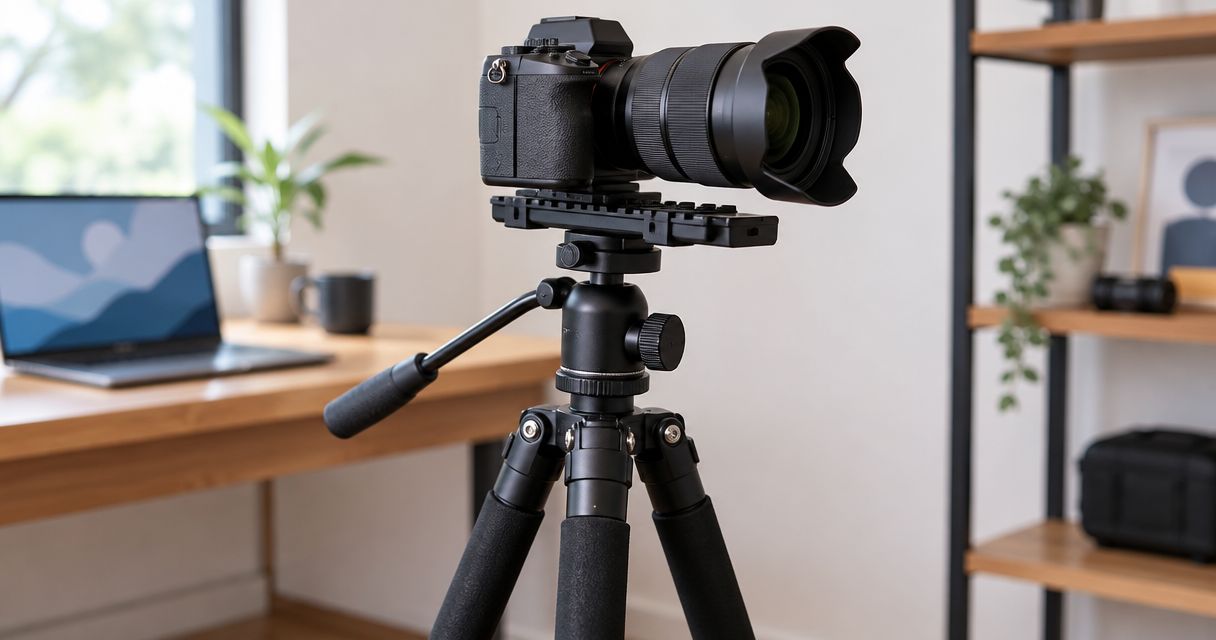
Instead of removing and repositioning your camera between checks, build a picatinny tripod setup that holds the camera independently: match the rail interface to the correct adapter, attach it to your tripod, then check the assembly for movement before use. The critical distinction is whether your camera has a Picatinny clamp or a Picatinny rail—those interfaces need opposite mating parts.
- A secure picatinny tripod setup starts with matching the camera’s rail or clamp to the opposite interface.
- Check tripod thread size and screw depth before tightening; matching diameter alone is not enough.
- Longshotcameras target cameras suit shooters who want remote shot-impact viewing; confirm mounting compatibility for the specific camera.
- Test the completed camera mount for rotation, sliding, and tripod instability before using it at the range.
Why this matters
A Picatinny interface and a tripod screw are different connections. A rail adapter bridges them, but only when both ends match your equipment. Buying an adapter because its description mentions both terms does not establish compatibility.
Longshotcameras target cameras are best for shooters who want remote shot-impact viewing. That use case makes a stable camera position important: a moving mount changes the view even when the camera remains connected. Longshotcameras sells target cameras and accessories; confirm the mounting interface on your particular model rather than assuming every camera uses the same fitting.
For a 2026 setup, start with the hardware in your hands, not the equipment category printed on a listing. A camera mount, tripod head, and removable plate each introduce a connection that needs its own check.
Before you start
- Gather the complete mounting chain: camera, compatible rail adapter, tripod with its head or mounting plate, the supplied fasteners, and the appropriate hand tools. Have the manufacturer’s mounting instructions available for each component.
- Identify both interfaces: determine whether the camera presents a projecting Picatinny rail or a clamp that grips one. Check whether the tripod connection is a 1/4-20 screw, a 3/8-16 screw, or a removable plate with its own attachment screw.
- Check screw depth before assembly: a screw can bottom out inside a threaded socket before the mounting faces meet. Apparent tightness does not prove that the adapter is clamped securely.
Do all assembly away from live firing. If the camera is currently attached to a firearm, follow the firearm manufacturer’s unloading and safe-handling procedure before removing it. Place or adjust equipment downrange only during an authorized ceasefire under the range’s rules.
Camera interface identification
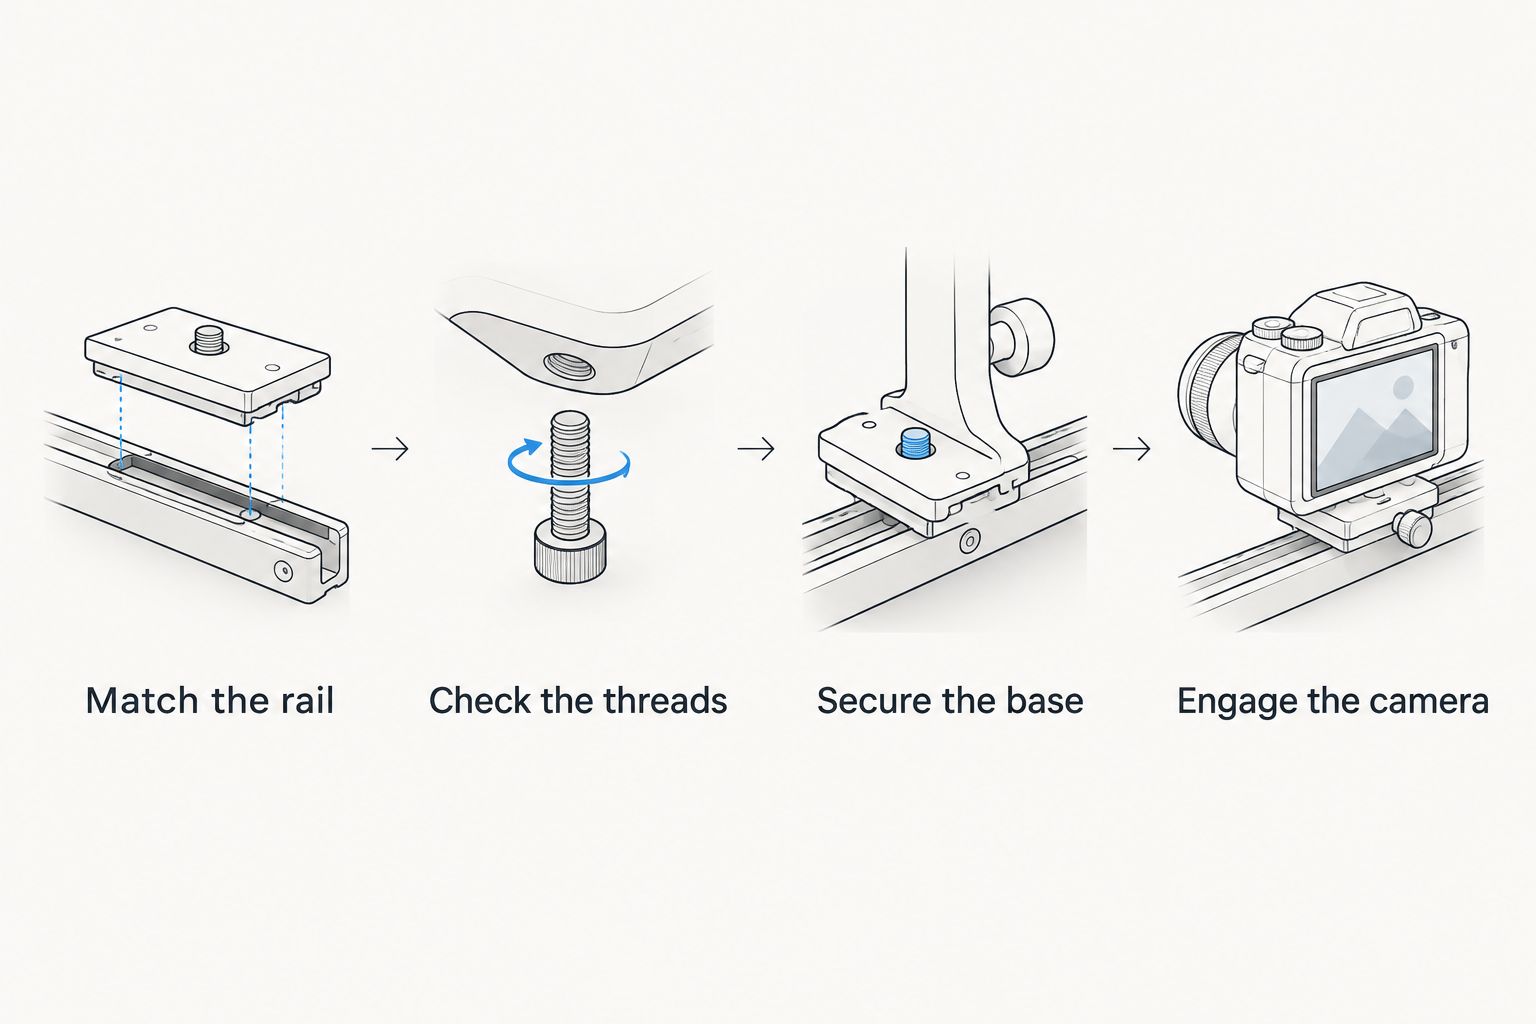
Match the rail direction
- Inspect the camera’s mounting surface. A rail has raised cross-slotted geometry; a clamp has opposing jaws intended to grip that geometry.
- Identify the mating part your camera requires. A camera with a rail needs a rail-gripping adapter. A camera with a clamp needs an adapter that presents a compatible rail section.
- Inspect the adapter’s underside. Confirm that it connects to your tripod screw or mounting plate without an improvised stack of unrelated fittings.
- Check clearance around the camera. The proposed adapter must not obstruct the lens, connectors, access covers, or mounting controls.
Expected result: you can describe the entire connection as camera, mating rail interface, threaded attachment, and tripod head. Every adjacent pair fits together mechanically.
The following table separates the common routes. These are interface choices, not interchangeable adapter descriptions.
| Mounting route | Best for | Advantage | Limitation |
|---|---|---|---|
| Rail-gripping adapter with a threaded base | A camera that presents a Picatinny rail | Connects the existing rail to a tripod attachment | The jaws and any cross-slot engagement must match the rail |
| Rail-section adapter with a threaded base | A camera that already has a Picatinny clamp | Gives the camera clamp a mating rail | Rail length and surrounding clearance must suit the clamp |
| Compatible rail adapter attached to a removable tripod plate | A camera you regularly remove from the tripod | Lets the assembled camera and adapter detach at the plate | Adds a plate connection that also needs checking for play |
Choose the mating interface before choosing convenience features. A quick-release mechanism does not correct the wrong rail direction. Use the Picatinny rail tripod adapter guide to compare adapter layouts after identifying your camera’s interface.
Check the threads
Common photographic connections include 1/4-20 UNC and 3/8-16 UNC. The first has a nominal 1/4-inch diameter and 20 threads per inch; the second has a nominal 3/8-inch diameter and 16 threads per inch. They are not interchangeable.
Start the screw by hand without loading the camera onto the connection. If the screw resists immediately, stop and inspect the specification and thread condition. Do not use a tool to make an uncertain connection engage.
Treat thread diameter, pitch, and usable depth as separate checks. A thread converter changes the connection size; it does not establish camera clearance, load capacity, or a suitable screw length.
For your 2026 equipment checklist, record the exact connection at the top of the tripod head. The thread below a removable head is not necessarily the same connection used by its camera plate.
Adapter and tripod assembly
Secure the base
- Spread the tripod legs on a stable surface and lock their adjustments according to the tripod instructions. Keep the camera supported separately while preparing the mounting connection.
- Remove the tripod plate if the head uses one. Inspect the plate, screw, adapter base, and mating surfaces for grit, damage, and loose parts.
- Place the adapter on the plate or tripod attachment. Confirm that the screw enters the intended threaded socket rather than a nearby unthreaded opening.
- Start the screw by hand, then tighten using the method and torque specified by the component manufacturer. Keep the adapter square against its mounting surface.
- Check that the mating surfaces meet as intended and the adapter does not swivel. If the screw becomes tight while a gap remains, stop: the screw may have bottomed out.
- Reinstall the plate, if applicable, and engage its retention mechanism fully. Check the plate’s seating before adding the camera.
Expected result: the adapter sits securely on the tripod attachment without rotation, an unexplained gap, or a partly seated plate.
Avoid adding washers simply to conceal a fit problem. Use only a screw, spacer, or plate arrangement approved for the components involved. Extra layers create additional interfaces and can reduce usable thread engagement.
Engage the camera
- Support the camera with one hand and open its clamp or the adapter’s clamp according to the mounting instructions. Keep your fingers clear of the closing jaws.
- Seat the rail fully in the clamp. Where the design uses a crossbolt or recoil lug, align it with a rail slot rather than leaving it perched on a raised section.
- Check both sides of the connection. The jaws must capture the intended rail surfaces, not an edge, cable, or adjacent housing.
- Tighten the clamp to its manufacturer’s specification while supporting the camera. Follow the specified lever adjustment procedure if the mount uses a lever rather than a screw.
- Apply gentle hand pressure in different directions. Check for sliding along the rail, lifting at a jaw, or rotation at the threaded base.
Expected result: the camera remains seated while the complete mounting chain resists gentle movement. A tight knob alone is not the acceptance test.
The assembly sequence is straightforward once the interfaces match. Keep this order in your 2026 setup notes so a replacement plate or adapter does not bypass the compatibility check.
Camera position and stability
Set the view
- Position the tripod where its legs have secure footing and the camera can see the intended target. Follow range rules for equipment placement and protection.
- Keep the camera’s weight over the tripod’s support area. Reduce unnecessary extension and avoid mounting arrangements that place the camera far to one side.
- Adjust the tripod head to frame the target, then lock the relevant movements according to its instructions. Move the legs rather than forcing the head beyond its adjustment range.
- Route any connected cables with enough slack for the intended movement. Keep them from pulling the camera or catching a leg.
- Open the camera’s viewing system using its model-specific instructions. Confirm that the target remains framed after you release the camera and controls.
- Recheck every connection after the initial positioning. Adjusting the head must not loosen the camera adapter or mounting plate.
Expected result: the image stays framed when you stop touching the setup, and the camera does not creep under its own weight.
Treat image movement as a mechanical clue before changing camera settings. Watch the assembly while gently checking each joint. A loose rail clamp and a slipping tripod head require different fixes.
Keep the same acceptance test when updating equipment in 2026: secure seating, stable support, unobstructed operation, and a view that holds its position. A new accessory does not replace those checks.
Repeat mounting with a removable plate
A second workflow makes sense when you regularly remove the camera for transport. Leave the compatible adapter attached to the camera and detach the assembly at the tripod plate, provided the component instructions permit that arrangement.
- Complete the full mounting and stability procedure before adopting the repeat workflow.
- Release the tripod plate while supporting the camera assembly. Do not lift the tripod by the camera or use the adapter as a carrying handle.
- Protect the exposed mating surfaces during transport so grit cannot prevent proper seating later.
- On reassembly, seat and lock the plate, check the safety retention where fitted, and repeat the movement test.
- Reframe the target. Do not assume that a removable plate returns the camera to precisely the same view.
Best for frequent removal: a compatible removable-plate arrangement reduces repeated handling of the threaded connection. Its trade-off is another joint to inspect, and it still requires a seating check every time.
Do not replace the tripod plate with a rail clamp merely because both detach quickly. They are different interfaces, and each must mate with its intended counterpart.
Troubleshooting
The screw tightens, but the adapter rotates
Check whether the screw has bottomed out before the mounting faces meet. Also inspect for a loose captive screw or debris between surfaces. Use the correct manufacturer-approved screw length or mounting arrangement; extra tightening is not a substitute for proper engagement.
The rail clamp closes, but the camera slides
Remove the camera while supporting it and inspect the jaw seating. Check that any cross-slot feature engages correctly and that the adapter is specified for the camera’s rail. A clamp that closes against the wrong surface can feel tight without retaining the rail correctly.
The image slowly tilts after positioning
Check the tripod head independently from the rail adapter. Confirm the head is locked, the camera is balanced appropriately, and the assembled load is within the limits of every supporting component. If the head continues to slip, stop using that combination rather than overtightening its controls.
The camera shakes when a cable moves
Remove cable tension and check the leg footing. Then inspect the plate, threaded base, and rail connection separately. Keep cable slack clear of moving parts so it does not become a new snag point.
The mount blocks a connector or access cover
Reorient the approved mounting arrangement if the instructions allow it, or select a compatible adapter with suitable clearance. Do not leave a rail partly captured just to expose a port. Access and secure engagement are both required.
Customize your workflow
Build your 2026 range checklist around repeatable inspections rather than a memorized tightening sequence. Record the adapter interface, tripod connection, specified tightening method, and any clearance restrictions in the same place as your camera instructions.
For a Longshotcameras target camera workflow, separate mechanical setup from connection setup. Establish the stable camera position first, then connect the viewing device and confirm the image. That order keeps a loose mount from being mistaken for a viewing-system problem.
If your position changes between bench-level and standing-height use, reassess the tripod rather than extending an unsuitable support. Check the complete assembly’s balance and the head’s ability to hold the camera at the required angle.
FAQ
How do I mount a Picatinny camera on a standard tripod?
Use an adapter that mates with the camera’s rail or clamp and connects to the tripod’s threaded attachment or plate. Assemble the base first, seat the camera fully, and check every joint for movement.
What’s the difference between a Picatinny rail and a Picatinny clamp?
A Picatinny rail is the projecting cross-slotted interface; a Picatinny clamp grips that rail. Your tripod adapter must present the opposite interface to the one on your camera.
Does every camera tripod use a 1/4-20 screw?
No. Common photographic connections include 1/4-20 and 3/8-16 threads, and the connection beneath a tripod head can differ from the camera attachment above it. Check the specific screw and socket before assembly.
Can I attach the camera directly without a rail adapter?
Yes, if the camera has a manufacturer-approved threaded mounting socket compatible with your tripod attachment. A rail adapter is unnecessary when a supported direct connection already exists.
Why is my tripod adapter loose when the screw feels tight?
The screw can bottom out before the mounting surfaces meet. Check screw length, socket depth, surface contact, and the manufacturer’s specified mounting arrangement before using the camera.
Can I leave the adapter attached during transport?
Leave the adapter attached only if the component instructions permit it and the case accommodates the assembly without pressure on the mount. Check seating and tightness again before use.
Can I position a target camera while people are shooting?
Do not go downrange during live firing. Place or adjust a target camera only during an authorized ceasefire and follow the range’s equipment-placement and access rules.
One last thing
A camera with a suitable threaded socket might not need a Picatinny adapter at all. Inspect the camera’s approved mounting points before adding hardware. The shortest supported connection chain removes joints you would otherwise have to inspect, without changing the requirement to verify screw depth, clearance, and stability.